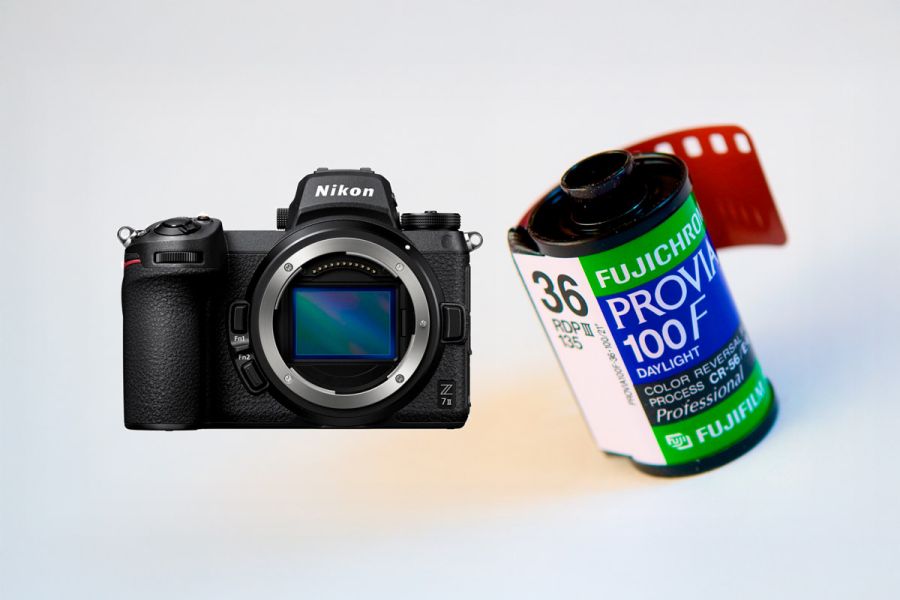
Resolution Comparison: Digital Sensors vs Film
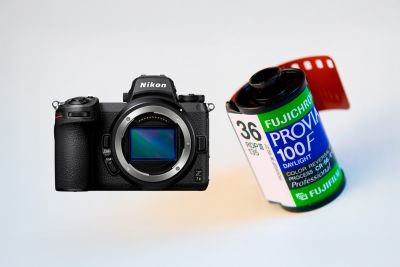
Quick summary: A 35mm slide (Velvia/Provia) practically delivers ~12 to 22 MP of usable detail. A 24MP full-frame sensor often outperforms it; a 45MP camera (Z7 II/Z8/Z9) mostly oversamples the film grain, offering greater editing flexibility but not significantly more image information.
Are your film scans looking “soft” at 100% zoom? That’s normal — modern sensors reveal more than what 35mm film can truly resolve. Below, I explain the theory (MTF, lp/mm), real-world tests, and a “gentle denoising” method to enhance the final result.
If you're scanning black and white negatives using a digital camera and Lightroom, check out this dedicated guide: Scanning black and white negatives with a digital camera and processing them in Lightroom.
For a full comparison of scanning methods (flatbed, slide scanner, digital camera), see: How to scan film: flatbed, Coolscan, or DSLR method?.
- Resolution comparison
- A personal context
- Tested gear & scope (specific + equivalents)
- Tech basics: lp/mm & MTF
- How many useful MP for Velvia / Provia?
- Nikon Z sensors: 24 MP vs 45 MP
- Why scan at 45 MP?
- Why do scans look “soft”?
- Gentle degrain: a practical method
- And what about medium format?
- Comparison recap
- Practical recommendations
Resolution comparison
How far does the useful detail of a well‑exposed, sharp 35 mm slide (Velvia/Provia) go compared to modern full‑frame sensors?
A personal context
While digitising my 1990s Formula 1 slides, a pattern emerged: at 100%, grain is crisp but the image still feels “soft”. This stems from several factors.
First, distinguish two digitising methods:
- Flatbed scanner: the rendering can look milky or low‑contrast. The CCD path and diffused lighting limit micro‑contrast.
- Mirrorless copy setup: punchier, crisper, more contrast. Why?
- Modern lenses are highly corrected—clinical but precise rendering;
- Camera settings: disable any auto sharpening, use a neutral Picture Control, shoot 14‑bit RAW at base ISO (64/100), and light with neutral continuous LEDs (5000–5600 K, high CRI).
In every case, a modern sensor can exceed the film’s exploitable resolution: you boost grain visibility more than subject detail.
Tested gear & scope (specific + equivalents)
Why list this? To ground the experience in real‑world practice while broadening the scope of the conclusions.
- Bodies: Nikon Z8 (45 MP) and Z5 (24 MP).
- Digitising: mirrorless slide duplication with a JJC holder; lenses: Nikkor Z 50 mm f/1.8 S and Nikkor MC 50 mm f/2.8.
- Reversal films (E‑6): Fujifilm Velvia 50 (ISO 50) and Provia 100F (ISO 100), comparable logic for other ISO 50/100 E‑6 films (e.g., Kodak Ektachrome E100).
Resolution‑based equivalences (comparable outcomes):
- ≈ 24–26 MP full‑frame: Nikon Z5/Z6, Canon R6/R8, Sony A7 III/A7C…
- ≈ 45–50 MP full‑frame: Nikon Z7 II/Z8/Z9, Canon R5, Sony A1… (more likely to oversample grain if capture/scan pushes micro‑contrast too hard).
These conclusions extend to most full‑frame bodies (~24, 36, 45 MP and beyond). With a DSLR, use MUP or Live View/EFCS, a 2–10 s delay or remote release, and a rigid tripod to eliminate micro‑vibrations. This comparison focuses on useful resolution (fine‑detail transfer/MTF), not just pixel count. For digitising methods (flatbed, dedicated film scanner, camera copy), see my detailed article: film‑scanning methods compared.
Tech basics: lp/mm & MTF explained simply
What does “useful resolution” really mean? Beyond pixels, we use notions like MTF to describe how a system conveys detail and contrast.
lp/mm (line pairs per millimetre) measures how fine a structure a medium can render—the higher the number, the tighter the light/dark alternations it can separate.
MTF (Modulation Transfer Function) measures a system’s ability (film + lens + digitising, or sensor + lens) to transmit the contrast of increasingly fine patterns. The closer MTF is to 1, the better the contrast is preserved; as it trends toward 0, fine details “drown”.
- MTF10 (~resolution limit): the pattern is barely discernible—very low contrast.
- MTF50 (~perceived sharpness): frequency at which contrast is halved—best correlates with the “bite” we perceive.
In practice: judge overall sharpness with MTF50; inspect MTF10 for extreme micro‑detail. That’s why a 45 MP full‑frame can look sharper than a Velvia/Provia slide—the sensor maintains higher MTF at high spatial frequencies, whereas film’s MTF drops faster due to grain and diffusion.
In plain terms: film can resolve very fine structures but with low contrast at the limit; sensors have discrete pixels yet preserve contrast better past a certain threshold. Hence a 24 MP full‑frame often looks sharper than an ultra‑high‑res film scan.
How many useful MP for Velvia / Provia?
Indicative conversions for 24×36 mm:
- Provia / Sensia 100 ISO resolution: 60 lp/mm → 4320×2880 px ≈ 12.4 MP
- Velvia 50 ISO resolution: 80 lp/mm → 5760×3840 px ≈ 22 MP
In practice, a well‑exposed, well‑focused, carefully digitised 35 mm slide yields 12–22 MP of useful subject detail, depending on film and shooting/scan conditions.
Extending this to medium format:
- 6×4.5: about 30–40 MP useful (Velvia near the top end, Provia/Sensia nearer the bottom).
- 6×7: about 50–70 MP useful, depending on film and digitising quality.
Nikon Z sensors: 24 MP vs 45 MP
- Z5/Z6 (24 MP): 6000×4000 px (~4230 dpi on 36×24). Generally above a well‑scanned 35 mm slide.
- Z7 II/Z8/Z9 (45.7 MP): 8256×5504 px (~5830 dpi). Often oversamples the slide: more editing latitude, not necessarily more subject information.
Why scan at 45 MP?
If a slide only delivers 12–22 MP of useful detail, why digitise it with a Z7 II, Z8 or Z9 at 45 MP?
- For fine local edits: range masks, precise touch‑ups, etc.
- For long‑term archiving: scan once, re‑edit many times.
- For large prints: even if grain is oversampled, richer files upscale more gracefully.
- For grain‑smoothing via controlled downscaling: reducing to 24–30 MP yields a very clean look.
Bottom line: oversampling increases workflow flexibility and editing latitude.
Why do scans look "soft"?
- Film does not contain more subject detail—raising sampling primarily boosts grain.
- Flatbeds often fall short of their quoted optical resolution.
- Viewing at 100% equates to a wall‑size print (120×180 cm and beyond), hence the perceived softness.
For capture and lighting methods (JJC duplicator, camera + macro), see the detailed guide: digitising methods compared.
Gentle degrain: a practical method
Context: Digitising with a Nikon Z8 and a 50 mm f/1.8 S + extension or MC 50 mm f/2.8 in a JJC duplicator makes grain quite contrasty. Goal: soften it without sacrificing subject detail.
- Shooting: ISO 64/100, 14‑bit RAW, electronic shutter, diffused LED light (CRI ≥95) 5000–5600 K, perfect parallelism. Avoid adding local contrast (Clarity/Texture) on import.
- In Lightroom / ACR (starting point):
- Sharpening: Amount 10–20, Radius 0.8–1.0, Detail 0–10, Masking 60–90 (hold Alt/Opt to target edges only).
- Noise reduction: Luminance 5–15 (low), Detail 30–50; Color 5–10.
- Optional: Texture −5 to −10 on flat areas (luminance range mask to protect edges).
- In Photoshop:
- Duplicate layer → Filter > Noise > Dust & Scratches, Radius 2–3 px, Threshold 2–5 → Layer mask to target skies and flats.
- Alternative micro‑smoothing: layer in Luminosity mode + Gaussian Blur 0.3–0.5 px → paint the mask over grainy zones.
- Light downscale to ~5000–6000 px wide for a 35 mm slide: reduces grain prominence while preserving subject content.
Important: Lightroom’s AI Denoise targets electronic noise (ISO gain). Film grain is a real texture—prefer controlled, selective softening.
And what about medium format?
Medium format is often imagined as a decisive quality leap. My take:
- A 24 MP full‑frame already surpasses a well‑scanned 35 mm slide.
- A 45 MP sensor (Z7 II, Z8) is often superior to 6×4.5 film in terms of useful detail.
- 6×7 film remains finer, with a potential of 50–70 MP useful. But beware: that gain is not automatic.
Why? You only reach that potential with optimal conditions: top‑tier optics, rock‑solid stability, precise focusing, rigorous processing. Otherwise, a so‑so 6×7 can look less sharp than a well‑executed 35 mm—or a modern full‑frame digital capture.
If you’re not working in advertising, beauty, still‑life, or any field demanding extreme resolution, don’t just follow influencer hype.
Right now, a used Nikon Z7 II or D850 (~€1800) offers fineness comparable to medium‑format film and enables gallery‑grade large fine‑art prints.
In short: there’s no need to invest in medium‑format digital or MF scanning gear if your main use is artistic, documentary, or archival.
Comparison recap
- Velvia / Provia (35 mm): 12–22 MP useful (depending on capture and digitising quality).
- 24 MP full‑frame: generally above a well‑scanned 35 mm slide.
- 45 MP full‑frame: often oversamples film; helpful for fine retouching and archiving.
- Medium format: 6×4.5 ≈ 30–40 MP; 6×7 ≈ 50–70 MP (still above a 45 MP full‑frame for subject detail).
Practical recommendations
- Digitising: full‑frame body + macro, even lighting, perfect film flatness.
- Workflow: batch work, keep RAW + XMP, document settings.
- Printing: up to 40×60 cm, a clean 24 MP file is enough; for larger formats, oversample cleanly and apply gentle grain softening.
About the author
Sebastien Desnoulez is a fine‑art photographer focused on travel and architecture. He explores photographic materiality with a sharp eye for light and composition. Passionate about the analogue heritage, he shares his research to help photographers get the most out of their archives.
All the photos displayed on this website are copyright protected © Sebastien Desnoulez. No use allowed without written authorisation.
Legal notice
Tags
I am represented by the gallery
Une image pour rêver
