


How to Preview Film Negatives with a Smartphone

You have strips of negatives sitting in a sleeve, and you simply want to know what they contain, without pulling out a scanner or paying for a contact sheet. With a smartphone, an even light source, and an inversion option, you can already preview your images in just a few seconds.
This method doesn’t replace a high-quality scan, but it’s perfect for sorting, spotting a specific image, noting a frame number, or deciding which strips deserve a proper scan or a more serious camera-based digitization.
Why preview negatives on a smartphone
When you rediscover film archives, the first obstacle is often simple: you no longer know what’s on the strips. Having contact sheets made, or going back to a lab “just to see,” can cost time and money, especially if your only goal is to select a few frames to digitize.
For quick previewing, a smartphone is surprisingly effective: it helps you spot a scene, an expression, a composition, a coherent sequence, and quickly discard failed frames. It’s also a practical solution if you don’t have a home lab, or if you want to move forward with sorting before investing in a scanner, a film digitizer, or a paid service.
The minimum setup for a readable result
The key point isn’t the smartphone, it’s the light. To get a readable image, you need an even light source, without hot spots or unwanted reflections.
- Option 1: an LED light pad (drawing-style light board), simple, thin, and even.
- Option 2: a window, in daylight, if the surface is uniform and you avoid direct sun. If the light is too harsh, you can place a sheet of paper between the window and the negative to diffuse it.
Example of an entry-level light pad: LED drawing light pad (often around 10 EUR, price may vary).
One last helpful detail: a microfiber cloth (or a blower) to remove visible dust, because on a backlit negative, dust jumps out immediately.
How to place negatives on a light source properly
Lay your negatives flat on the light source. If the strip curls, hold it down at both ends with two clean small objects (or bits of paper), making sure you don’t cover the frames. The goal is to avoid blurred areas and reflections.
Then, position the smartphone above the negative as parallel as possible. A slight tilt can reduce readability, especially if the light isn’t perfectly even.
Tip: lower the ambient light a little (or create shade with your hand) to see the image more clearly, especially if you’re near a window.
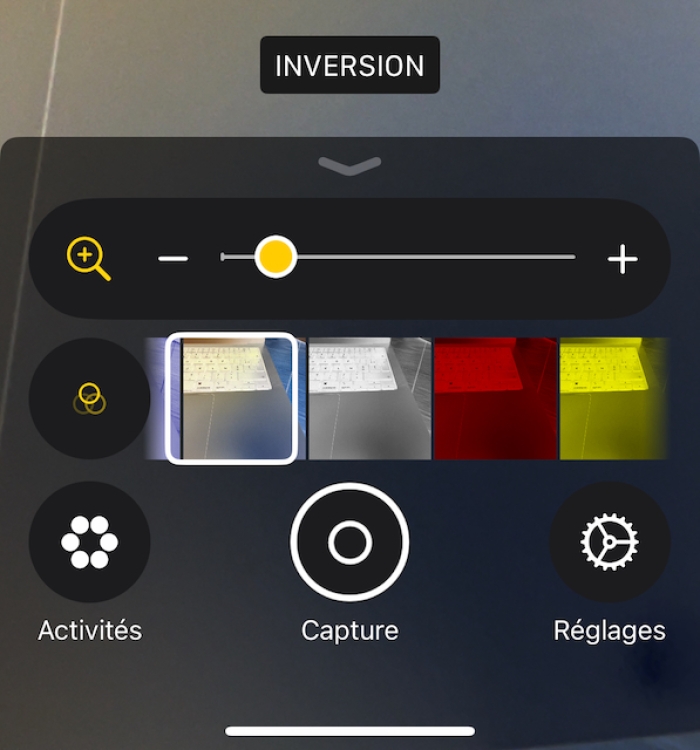
iPhone: using the Magnifier app and the Invert filter
On iPhone, the Magnifier app is very handy because it includes filters that directly turn a negative into a “positive” image on screen.
- Open the Magnifier app.
- Hold the iPhone above the negative, as if you were photographing it.
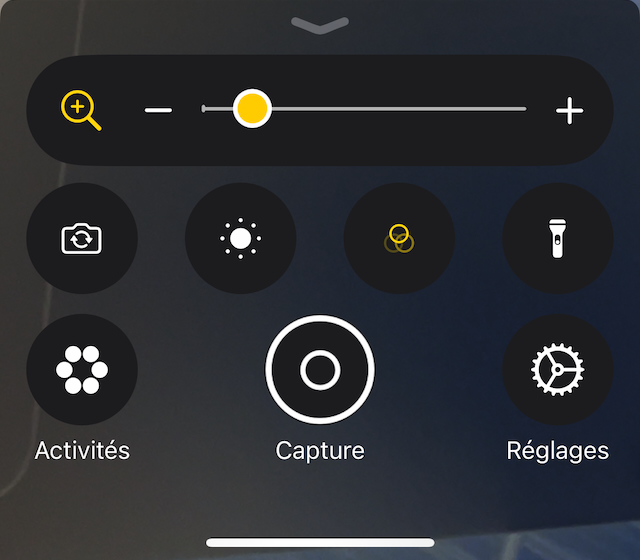
- Open settings (icon with three interlocking circles).
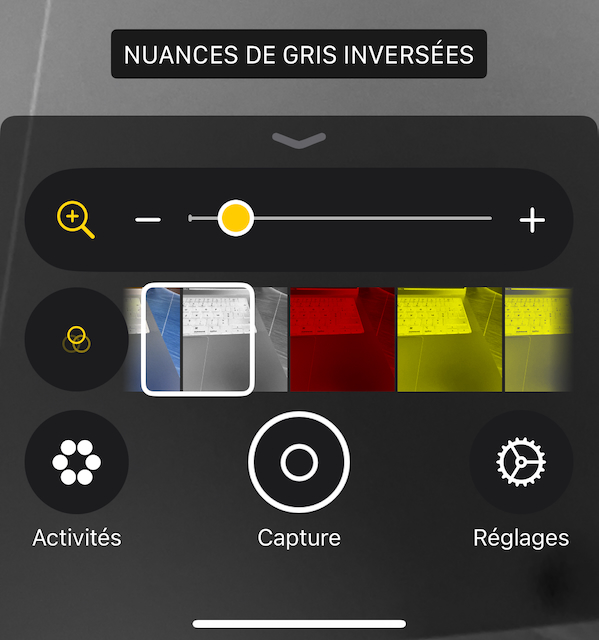
- Select a filter: Invert for color negatives, or Inverted Grayscale if you want a black-and-white preview.
- Zoom in to check a frame, read a detail, or locate a frame number.
You can then “capture” a screen image if you want to keep a quick record of your selection (without claiming faithful digitization).


Tips to see better and sort faster
Stabilize the iPhone: to read an image, stability matters more than resolution. Rest your elbows, or lightly brace the phone on a support above the light pad (without touching the film if possible).
Avoid hot spots: if the light is stronger in the center, move the strip or adjust your position to find the most even area.
Use zoom wisely: zoom is great for checking a frame, but for sorting a strip, start wide, then zoom only when an image catches your eye.
Write down your picks: a simple notebook is enough. Note the sleeve, the strip, and the frame number—you’ll save a lot of time when scanning or digitizing later.

For black and white: even with B&W negatives, the “inverted grayscale” filter can be more comfortable for judging tones and contrast without being influenced by the light source’s color cast.
Limitations and alternatives
This method is a preview. It won’t produce a file suitable for printing, it won’t deliver reliable color, and it won’t manage highlights and shadows precisely. The rendering depends on the light, the screen, and the filter used.
That said, for sorting, understanding what’s on a strip, spotting a sequence, and deciding what to digitize, it’s one of the fastest and least expensive approaches.
If your goal is to archive properly, edit, or publish, you’ll eventually want a true digitization workflow, either scanning or a camera-based setup, depending on your standards and the volume of your archive. To go further, you can read: How to scan your film photos: flatbed scanner, Nikon Coolscan, or camera? and Digitize black-and-white negatives with a camera and process them in Lightroom. You can also browse the Photo gear and technical tips section.
FAQ
Does it work with slides (positives)?
Yes, but inversion isn’t needed. However, an even light source is still essential to judge the image correctly.
Do you absolutely need a light pad?
No. A window can work in a pinch, but a light pad is often more even and more comfortable, especially in the evening or in winter.
Can you get good quality by “capturing” the screen?
For sorting, yes. For archiving, no. A screenshot is useful to remember a selection, but it doesn’t replace proper digitization.
Invert or inverted grayscale: which should you use?
For a color negative, start with Invert. For a black-and-white preview, or to judge composition without being influenced by color, try inverted grayscale.
Why does the image sometimes look washed out or too contrasty?
That’s normal: the dynamic range depends on the light, the smartphone’s auto-exposure, and the filter. The goal here is to see, not to finalize.
Conclusion
Previewing negatives on a smartphone is a simple, fast, and inexpensive trick to bring film archives back to life. In just a few minutes, you can identify a scene, isolate the frames worth keeping, and prepare your future digitization without wasting time or multiplying costs.
About the Author
Sebastien Desnoulez is a professional photographer specializing in architecture, landscape and travel photography. Trained in photography in the mid-1980s, he covered Formula 1 races and reported from around the globe before devoting himself to a more demanding fine art photography practice blending composition, light and emotion. He also shares his technical expertise through hands-on articles for passionate photographers, built on a solid background in both film and digital photography.
Tags


